
Ceramic tile can be a nice hard surface to have installed in your home. It is very easy to clean, durable and generally lasts a long time.
But as with anything around the house, tile can get damaged. Cracked ceramic tiles are common, whether it be from a blunt force accident or just a weak tile that has given way from years of use.
Chipped tile can sometimes get worse, giving way to growing cracks. While repairing cracked ceramic is one of those tasks you probably put off, you should think again.
Cracked floor tile can be an opening for moisture to get through to your sub-floor, especially if it’s in a bathroom.
It goes without saying, the problems you have, if the broken tiles are in your shower or bath.
There are a couple of ways to fix cracked tiles, a cover-up (easy) and the replacement of cracked tiles (best method).
Repairing a Piece of Cracked Tile
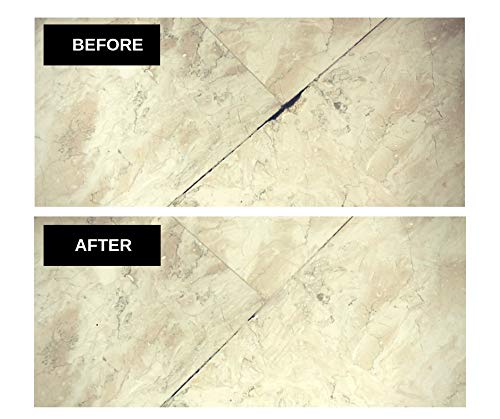
Depending on how severe your ceramic tile damage is, you may be able to fill your tile cracks. Hairline cracks are good candidates for this approach.
Your goal here is to both seal and strengthen the split area to avoid moisture problems and keep any crack from getting worse. After all, you have to walk on this surface!
Epoxy to the Rescue
Pick up some strong-holding epoxy that is made specifically for bonding stone and other porous materials together. 2-part epoxy (the kind you squeeze or pour out and then mix together to activate), is the best “super” glue. This will be your cracked tile filler.
We highly recommend a product called GraniTile 360. This stuff is easy to use and works wonders on damaged tiles, from hairline cracks to larger, more visible cracks.
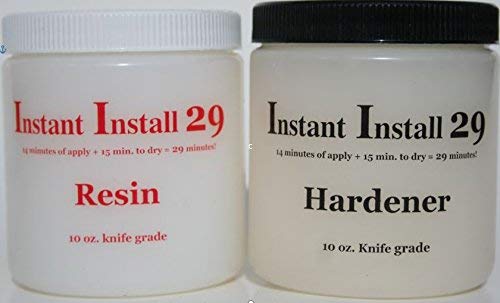
Instant Install 29 360~8 oz. epoxy Knife-Grade kit
Applying Your Epoxy Filler
It’s pretty easy to use with simple directions to follow.
1. First, clean the area around the crack you’re filling with rubbing alcohol or acetone.
2. Next, remove equal parts from each bottle to create your ideal mix. You’ll want to use something like a wooden chopstick or pop-cycle stick. Use one stick for the Resin and a separate one for the Hardener.
Be sure to make your little mix on top of a scrap piece of wood, cardboard, or a flat surface lined with wax paper.
3. Wait about 7 minutes, then scrape away the excess from the top surface with a razor blade.
Want a tip?
Grab a couple small tile samples at a big box store and crack them with a hammer or similar tool. Then try and fix them to see how the process works for when you do the real job on your floor or countertop.
This product is made to work with granite, marble, travertine, and other stone types (porous or not) and mends cracks, chips, divots, and complete breaks that have to be put back together.
Talk about a magic tile repair product!
If you just have a very small piece to glue and have a good glue gun on hand, then you can try using it in a pinch. But seriously, epoxy is still ideal!
Tinting Your Filled Crack
After it’s completely dry you can decide if you need to conceal the crack in the tile or not. If it was a small crack, there’s a chance you don’t need to color the small amount of epoxy.
Mixing pigments (colors) together to “tint” the epoxy to match your tile color is what most people do.
Liquid tints and powder tints are both popular. The idea is the same: Mix the colorants together until you have the tint that matches your tile.
We recommend the EZ-Tint powder since it’s easier to add finer amounts of pigment to get closer to your desired color.
Whatever you decide, you can be assured that the weakness of the crack will be eliminated as well and an appropriate seal will be in place from the epoxy application.
Use paint to cover the crack (optional)
If you’re fixing old tile, and don’t care so much about appearances you can go “old school” and use paint.
You’ll have to use your artistic side, but the best approach is to go light and use a small brush to layer the paint onto the tile crack.
At your home center, you can find a clear coat sealer made for tile. This would be good to put on top of your painted area once it’s dry.
Replacing Cracked Tile
If your cracked or chipped ceramic tile is too big to repair as described above, then replacement is probably necessary.
If you don’t have a matching tile to replace the broken one with, evaluate how the rest of the floor tiles look. Perhaps it would be better to replace the entire floor.
Usually though, you’ll find spare tiles left over from the original installation in the garage, basement, or shed. If not, you may be surprised at how close you can match a broken piece of tile.
Pick up some samples at the store and bring them home to help you. If it’s too hard and you don’t want to replace the whole floor consider replacing several tiles and make a pattern with the mixed-matched type. Use your creativity!
How to replace your cracked or broken tile?
Knock out the grout
First, remove the grout around the damaged tile. Use a hammer and metal chisel. Be very careful not to damage or nick adjacent tiles, so use a gentle but firm touch.
Break out the bad tile
Now, break out the cracked tile. Use a larger chisel than what you used for the grout and hammer it at an angle away from you, working from the center to the edges. Again, be careful at the edges.
Remove the old adhesive
When the broken tile pieces are all removed, you need to scrape off the adhesive from the underlayment (either plywood or cement board). Scrape it off with a solid metal blade, seeking a smooth surface without gouging or chipping the under-layment.
Re-apply Thin-set
Now, apply thin-set mortar to the sub-floor surface where your replacement tile will set.
Use the notched side of a mortar trowel to create the needed grooves in the mortar. Be sure to leave an empty gap near the edges to allow the mortar to spread (you don’t want it oozing out when you set the new tile in).
Cut and Place New Tile
Of course, you have a good wet tile saw, right? It’s ok if not, you can always borrow one from a handy neighbor, get a handyman to do it, or ask your local home center if they do tile cuts.
Once the new piece is cut, set it in and press firmly after it’s even with neighboring tiles (spacers can be used).
Ensure it is all the way down and level by tapping with a rubber mallet on a piece of scrap wood wrapped with a cloth or an old piece of carpet.
Get ready for the new grout
Prepare the side gaps for grout, by scraping any mortar out (before it dries) with a flat screwdriver. Wipe any excess off the new tiles and surrounding area and let it dry overnight or according to the instructions on the mortar package.
Mix and apply your new grout
Using pigment, mix several grout samples so you can figure out what you need to match the existing grout. When you’re ready, fill the joints with your grout (you won’t be using much for this project, especially if you’re just fixing one cracked tile!).
Apply grout sealer as normal using a small paintbrush.
Now, be happy you’ve fixed your cracked ceramic tile problem for good!
Repairing Tile Cracks FAQs
How to Repair Cracked Grout Around Tile?
Fortunately, cracked grout is an easy fix that takes a few simple tools.
Here’s what you need to do:
- Remove any cracked grout around the tile with an oscillating saw or small grout saw.
- Scrub the surrounding grout with a household cleaner to remove any dirt or buildup. This will help you match grout colors much more easily.
- Using the hose attachment, vacuum the area well to remove all the grout you took out and any dust left behind.
- Purchase grout that matches the existing grout and prepares a small amount as instructed on the package.
- Fill the gaps between tiles with the grout mixture using a grout float. Press into the gaps to make sure they are filled nicely and scrape off the excess.
- Let it dry for about 30 minutes and then wash the residue off with a wet sponge.
- Depending on the type of grout purchased, let it dry for around 24 hours and then seal with a grout sealant.
What Causes Hairline Cracks in Tile?
A crack in your tile could be as simple as something heavy was dropped on it, or something a bit more involved such as the floor was installed incorrectly.
If the floor is uneven or there is something under the tile, such as dried grout or dirt, it can crack under normal use.
Can Porcelain Tile Be Repaired?
Short answer, yes!
Porcelain tiles can usually be repaired quickly if they are chipped.
You can get a tile repair kit like this one, which includes putty and multiple pigments for you to fill the chip and match the color.
These kits are pretty cost-efficient and straightforward.
If your tile is cracked, you may need to replace the entire tile instead of only repairing the damage. Cracked tiles can trap moisture and lead to water damage if it is not taken care of properly.

Salem Tile Setters
Friday 27th of February 2026
Great guide! The tips on assessing whether to repair or replace a cracked tile — makes the whole process much easier to tackle for a DIY project.